

Introduction – how to make a Twitter moment
I love to use social media channels and web2 properties in my seo strategies. Especially the likes of Twitter, Youtube and other Google properties like Google sites. I always try to think strategically about things. And when it comes to Twitter, I think: Twitter is (partly) owned by Google. As such, its probably given special attention when it comes to indexing and ranking power. Kind of like Google sites.
So for the last 2 years I have been actively building a lot of tweets and Twitter moments for myself and my clients, but recently Twitter changed their user interface for creating Twitter moments. Hence this blogpost to show you in detail how to go about creating your favourite Twitter moment in 2022.
Be sure to check out my link building training on advanced strategies for creating Twitter moments and using them in your linkbuilding.
Step 1: Make tweets from your account
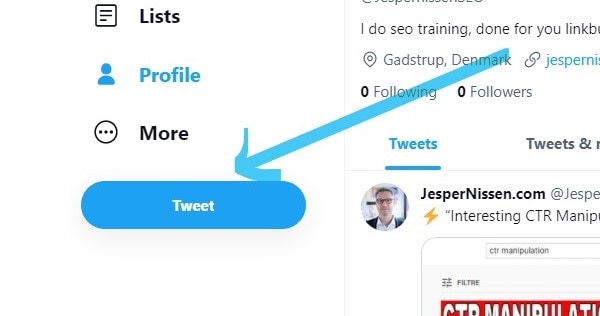
Login to your Twitter profile, click the blue tweet button and create a tweet. Tweets can be text only, images or even text with link to your website or Youtube channel. You can create multiple tweets at the same time, by clicking the small + button next to the Tweet button. You will want to make an image only tweet at this stage, since you must select the cover image for your Twitter moment from your recent tweets.

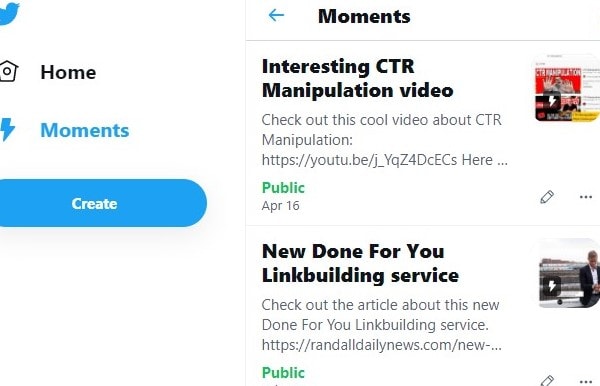
Navigate to the Twitter moments builder, by clicking the More option in the left menu and then click the Moments option.
Step 3: Create the Twitter moment
At this point in time, you are seeing your complete list of Twitter moments. Which, if you are trying it for the first time, will be empty. Click the blue Create button to start.
Step 4: Add a title and description to your Twitter moment
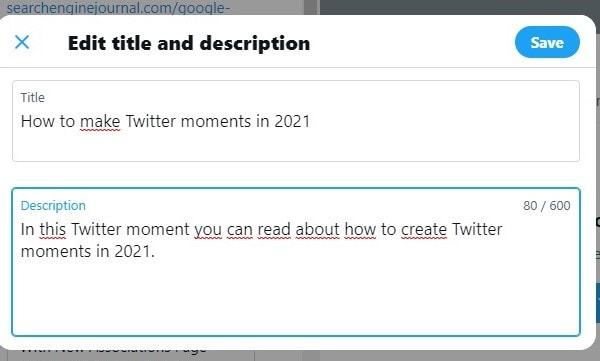
You should now see a split screen. Your list of available tweets on the left side of the screen, and you see a preview of your finished Twitter moment in the right side of the screen. Click the pencil icon on the right side, to add title and description of your Twitter moment. Remember to insert relevant keywords in your description.
Step 5: Add tweets to the Twitter moment
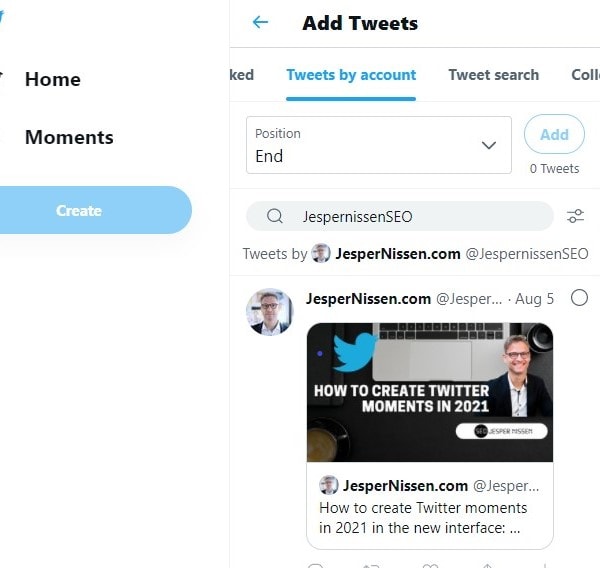
This part is where Twitters UI department somehow made it much more user unfriendly. You must look in the upper left part of your screen to see the different kinds of tweets you can add:
- Tweets I´ve liked: All the tweets your account has liked.
- Tweets by account: All the tweets by your own account or any other account.
- Tweet search: You can use the search bar to search for a specific Tweet, a word that has been tweeted or Tweets using a hashtag.
- Collection ID: You can import a Collection ID that you created on Tweetdeck.
What you do now is you select Tweets by account, and then search for your own Twitter account name in the search field. You should now see the complete list of Tweets from your account. Select the Tweets to be included. Click Add when you are done.
Twitter has previously recommended that we include around 8-10 Tweets when creating Twitter moments, so that’s what Im going for.
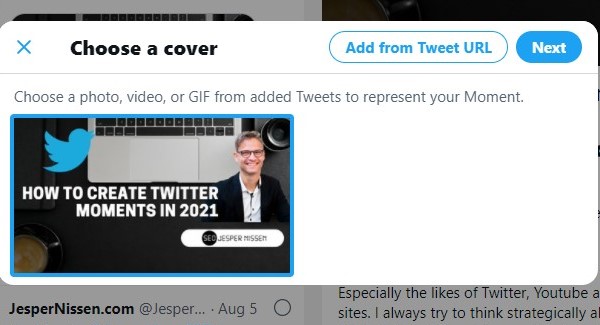
Step 6: Add cover image
If you have selected the tweet with an image, you can now select this to be your cover image. Click the camera icon in the upper right part of the screen. In the pop-up screen you see now, You should see the images that you have tweeted, and included in the Twitter moment. Select the image you want, and click Next.
If you click the button Add from Tweet URL, you have the option to directly add the Tweet url with the image you want to include.
Step 7: Crop cover image
When you have selected the image you must now crop it to fit desktop and mobile view.

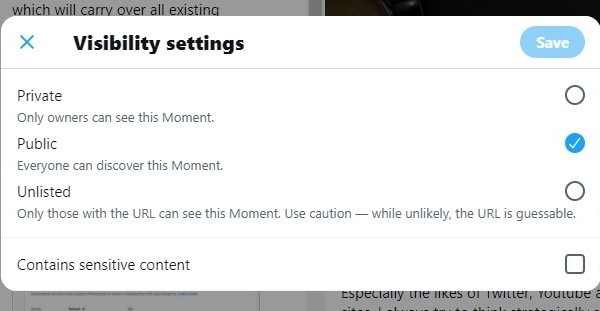
Step 8: Publish your Twitter moment
Take a minute to go over everything. Click the blue Publish button to publish your Tweet. Select it to be Public. Otherwise people cannot see your Twitter moment.
Step 9: Tweet your Twitter moment
Its perhaps a bit unintuitive, but you must now Tweet your Twitter moment in the pop-up screen. Click the blue Tweet button, and you should be done now.
A good advice is to share the Twitter moment in Facebook, Tumblr, your WordPress blog, and other obvious places. Have your friends retweet the Twitter moment to give it more traction in Google.
I hope you found the above guide useful. Happy Tweeting! And again, check out my training on Twitter moments!


